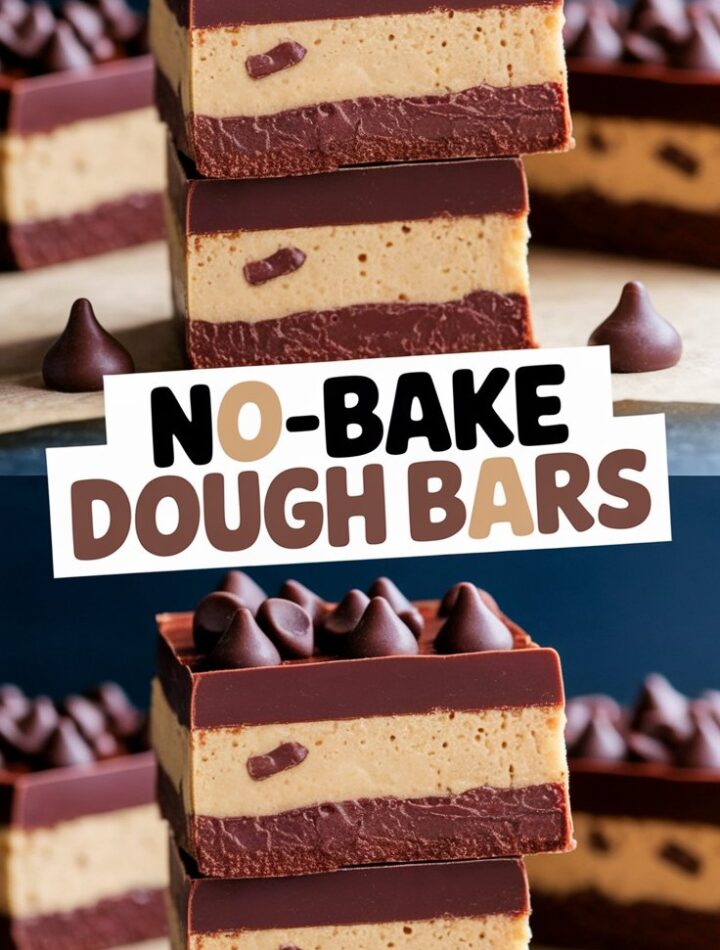
There is something undeniably comforting about cookie dough. From its soft, sweet texture to the warm nostalgic feeling it brings, cookie dough has been a dessert favorite for generations. But as much as people love sneaking a spoonful while baking, traditional raw cookie dough isn’t made to be eaten as-is because of raw flour and eggs. This is where No Bake Cookie Dough Bars step in as the perfect solution.
These bars bring all the flavor you love from classic cookie dough—creamy, soft, rich, and studded with chocolate chips—but in a safe-to-eat, no-oven-needed dessert. They are ideal for anyone craving quick sweets, parents looking for kid-friendly treats, or dessert lovers who want something simple, fun, and delicious.
What Are No Bake Cookie Dough Bars?
No Bake Cookie Dough Bars are a layered dessert made from edible cookie dough pressed into a tray and topped with melted chocolate. Unlike classic cookie dough used for baking, this version is intentionally crafted to be eaten without cooking.
These bars are:
- Safe: Made without eggs and using heat-treated flour
- Soft and chewy: The texture mimics real cookie dough
- Quick to prepare: Requires no oven or complex steps
- Customizable: You can add nuts, candies, sprinkles, and more
- Kid-friendly: Great for lunchboxes, parties, or weekend treats
- Perfectly portioned: Slice into bars, bites, or cubes
The beauty of this dessert lies in how effortlessly it comes together while delivering a rich, indulgent flavor.
Why You’ll Love This Recipe
1. No Oven Needed
Perfect for hot weather, busy days, or when you simply want a no-stress dessert.
2. Safe to Eat Raw
Using heat-treated flour and zero eggs ensures safety without compromising taste or texture.
3. Quick and Easy
Most of the work is mixing, pressing, and chilling. The recipe takes about 10 minutes to assemble.
4. Highly Customizable
You can swap flavors, add mix-ins, change chocolate toppings, or modify sweetness levels.
5. Crowd-Pleasing
Whether it’s a potluck, birthday party, movie night, or after-school treat—these bars disappear fast.
6. Long Shelf Life
They stay fresh for days in the fridge and freeze wonderfully.
7. Beautiful Presentation
The smooth chocolate layer paired with cookie dough creates a stunning, bakery-style look.
Ingredients Overview
Below is a detailed explanation of each ingredient, why it’s used, and how it affects the final texture.
Heat-Treated Flour (Makes It Safe to Eat)
Raw flour can contain bacteria, so heating it eliminates risk. Heat treatment prevents illness while maintaining familiar cookie dough consistency.
Butter
Provides creaminess and richness. Melted butter ensures the dough mixes smoothly.
Brown Sugar
Adds moisture, chewiness, and a deep caramel-like sweetness.
Granulated Sugar
Balances the flavor and keeps the sweet profile light instead of overly rich.
Milk
Helps bring the dough together, improving softness and preventing crumbly texture. Dairy-free milk also works.
Vanilla Extract
Enhances classic cookie dough aroma.
Salt
Balances sweetness and deepens flavor.
Mini Chocolate Chips
Perfect size ensures even distribution in every bite.
Chocolate + Butter for Topping
Creates a smooth, sliceable chocolate layer that gives structure and visual appeal.
Full Ingredients List (For the Recipe Card)
- 1 ½ cups all-purpose flour (heat-treated)
- ½ cup unsalted butter, melted
- ½ cup packed brown sugar
- ¼ cup granulated sugar
- ¼ cup milk (any type)
- 1 teaspoon vanilla extract
- ¼ teaspoon salt
- 1 cup mini chocolate chips
Chocolate Topping:
- 1 cup chocolate chips (milk, semi-sweet, or dark)
- 1 tablespoon butter
How to Heat-Treat Flour
To make flour safe for raw consumption, heat-treat it using one of the following methods:
Microwave Method
- Spread flour on a microwave-safe plate.
- Microwave in 30-second intervals, stirring occasionally.
- Check with a thermometer—flour must reach 165°F (74°C).
- Let cool completely before using.
Oven Method
- Spread flour on a baking tray.
- Bake at 350°F (175°C) for 5–10 minutes.
- Stir halfway through.
- Cool before adding to dough.
Expert Tip:
Sift heat-treated flour to eliminate lumps and create smoother dough.
Step-by-Step Instructions
1. Mix the Wet Ingredients
In a large mixing bowl, combine melted butter, brown sugar, granulated sugar, milk, vanilla, and salt. Mix until smooth and glossy.
2. Add Heat-Treated Flour
Gradually add flour to the wet mixture while mixing. The dough should become thick, soft, and slightly sticky.
If too crumbly → Add 1–2 teaspoons of milk.
If too soft → Add 1–2 tablespoons of flour.
3. Fold in Chocolate Chips
Use mini chips for even distribution. Fold gently to avoid melting.
4. Press Dough Into Pan
Line an 8×8-inch pan with parchment. Press dough evenly across the bottom.
5. Prepare Chocolate Topping
Melt chocolate chips with 1 tablespoon butter in the microwave using 20-second intervals. Stir until smooth.
6. Spread Topping
Pour melted chocolate over cookie dough layer. Smooth with a spatula.
7. Chill
Refrigerate for at least 2 hours (longer gives firmer bars).
8. Slice and Serve
Lift parchment to remove the slab. Slice into bars or squares using a sharp knife.
Texture Guide: What to Expect
- Soft: Like edible cookie dough
- Chewy: Thanks to brown sugar
- Firm top: Due to the chocolate layer
- Sliceable: Ideal for clean-cut bars
If you prefer softer bars, chill for less time.
For firmer bars, freeze for 10–15 minutes before slicing.
Expert Tips for Perfect Cookie Dough Bars
1. Use Melted Butter for Smooth Mixing
Softened butter may leave clumps, affecting texture.
2. Do Not Over-Mix
Over-mixing can make the dough grainy.
3. Chill Properly
Under-chilling causes messy slices and uneven bars.
4. Use High-Quality Chocolate
Better chocolate = smoother topping and superior flavor.
5. Use Mini Chips
They blend into the dough better than full-size chips.
6. Add Topping Before Dough Fully Chills
It helps the chocolate layer adhere without separating.
7. Slice With a Warm Knife
Dip knife in hot water, wipe, then cut.
Flavor Variations
This recipe is extremely versatile. Here are some delicious ideas:
1. Peanut Butter Cookie Dough Bars
Add ½ cup creamy peanut butter to the dough.
2. Funfetti Bars
Stir in rainbow sprinkles for a birthday-style treat.
3. Double Chocolate Bars
Use chocolate cookie dough + dark chocolate topping.
4. Oreo Cookie Dough Bars
Add crushed Oreo pieces and top with white chocolate.
5. Salted Caramel Bars
Stir caramel bits into the dough and add flaky sea salt on top.
6. Nutty Delight Bars
Add chopped almonds, walnuts, or pecans.
7. Protein Cookie Dough Bars
Replace ¼ cup flour with vanilla protein powder.
8. Healthy-ish Version
Use coconut sugar, almond flour, and dark chocolate.
9. Vegan Bars
Use vegan butter + plant milk + dairy-free chocolate chips.
Common Mistakes and How to Fix Them
1. Dough Is Too Dry
Add milk 1 teaspoon at a time.
2. Dough Is Too Soft
Add a little flour or chill longer.
3. Chocolate Cracks When Cutting
Let bars warm for 5 minutes before slicing.
4. Dough Tastes Grainy
Ensure sugars are well combined with butter.
5. Chocolate Separates From Dough
Press the dough firmly so layers bond properly.
Storage Instructions
Refrigerator
Store in an airtight container up to 7 days.
Freezer
Wrap bars individually in plastic + place in airtight container.
Freeze for up to 3 months.
To serve, thaw for 10–15 minutes.
Serving Ideas
- Serve chilled with cold milk
- Cut into mini bites for parties
- Drizzle caramel or chocolate on top
- Add whipped cream or ice cream on the side
- Create a dessert board with fruit, pretzels, and bars
FAQs
Are these bars safe to eat raw?
Yes! Heat-treated flour + no eggs = safe to enjoy.
Can I skip the chocolate topping?
Absolutely. They taste great as plain cookie dough bars too.
Can I use almond flour instead?
Yes, but texture will be softer. Almond flour doesn’t need heat treatment.
Can I make these bars dairy-free?
Use vegan butter + almond/oat milk + dairy-free chocolate.
Can I double this recipe?
Yes, use a 9×13-inch pan.
How long should I chill the bars?
At least 2 hours, but overnight is best.
Conclusion
No Bake Cookie Dough Bars are the perfect blend of simplicity, creativity, and delicious comfort. With minimal ingredients, zero baking, and endless customization options, they are a dessert everyone can master. This guide equips you with everything needed to create bars that taste incredible, look beautiful, and surpass any other recipe online.