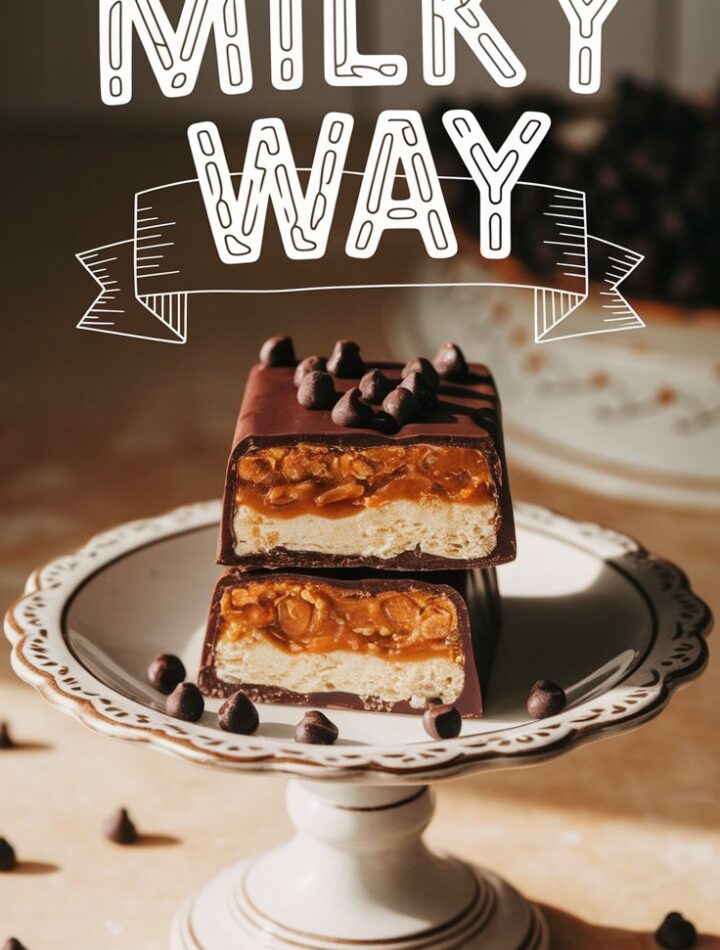
Few sweets trigger childhood nostalgia quite like the silky, chocolate-covered Milky Way bar. The combination of fluffy vanilla nougat, buttery caramel, and smooth milk-chocolate coating has delighted generations. While the store-bought version is easy to grab at the checkout line, crafting your own Homemade Milky Ways delivers a richer, fresher, and more satisfying experience.
This comprehensive guide walks you through every detail—ingredients, equipment, techniques, flavor variations, troubleshooting, and storage—to help you master the art of homemade candy making. It’s written in plain, friendly language yet follows professional standards so that your bars look and taste as if they came from a chocolatier’s kitchen.
Why You’ll Love Making Homemade Milky Ways
- Superior Taste and Texture – You control the quality of chocolate, caramel, and nougat, guaranteeing purer flavor than mass-produced bars.
- Customizable Sweetness – Adjust sugar or chocolate intensity to your preference.
- Freshness You Can Taste – Homemade candy has no preservatives; each bite is melt-in-your-mouth soft.
- Fun, Educational, and Rewarding – Making candy at home introduces you to sugar-work science and the magic of transformation.
- Perfect for Gifts and Celebrations – Wrap each bar beautifully for birthdays, holidays, or homemade treat boxes.
Understanding the Three Essential Layers
To perfect homemade Milky Ways, you must understand how each layer functions:
1. The Nougat Foundation
Light, fluffy, and sweet—nougat is a whipped mixture of egg whites (or aquafaba for a vegan option) and hot sugar syrup. It provides that iconic chewy bite.
2. The Caramel Core
Caramel adds a buttery, golden contrast to the airy nougat. It’s made by carefully heating sugar until amber, then enriching it with butter and cream.
3. The Chocolate Shell
A coating of milk chocolate (or dark/white chocolate variations) ties everything together with smooth decadence.
Ingredients
(All quantities are listed for about 12–15 bars.)
For the Nougat
- 1 cup (200 g) granulated sugar
- ¼ cup (60 ml) light corn syrup or golden syrup
- ¼ cup (60 ml) water
- 2 large egg whites, room temperature
- 1 teaspoon vanilla extract
- ⅛ teaspoon salt
For the Caramel Layer
- 1 cup (200 g) granulated sugar
- 6 tablespoons (85 g) unsalted butter
- ½ cup (120 ml) heavy cream
- 1 teaspoon vanilla extract
- Pinch of salt
For the Chocolate Coating
- 2 cups (340 g) milk-chocolate chips or chopped chocolate bars
- 1 teaspoon neutral oil (optional, for smoother dipping texture)
Essential Tools
- Heavy-bottomed saucepan
- Candy thermometer
- Stand or hand mixer
- Silicone spatula
- Parchment paper
- 9 × 9 inch (23 × 23 cm) baking pan
- Sharp chef’s knife
Step-by-Step Instructions
Step 1 – Prepare the Pan
Line the pan with parchment paper, leaving a little overhang on each side. Lightly grease it to ensure easy removal later.
Step 2 – Make the Nougat
- In a saucepan, combine sugar, corn syrup, and water.
- Heat over medium until the mixture reaches 245 °F / 118 °C on a candy thermometer.
- Meanwhile, whip the egg whites and salt on high until stiff peaks form.
- Reduce the mixer speed to low and carefully drizzle the hot syrup into the egg whites.
- Increase speed to medium-high; beat until thick, glossy, and slightly cooled.
- Add vanilla extract.
- Spread the nougat evenly into the prepared pan. Smooth the top.
Tip: Work quickly—nougat firms fast once cooled.
Step 3 – Prepare the Caramel
- Melt butter in a clean saucepan over medium heat.
- Add sugar, stirring constantly until it melts and turns a deep golden amber.
- Slowly pour in warm heavy cream (it will bubble vigorously).
- Continue stirring until the caramel reaches 245 °F / 118 °C.
- Remove from heat; add vanilla and salt.
- Allow it to cool for 5–7 minutes, then pour evenly over the nougat layer.
- Refrigerate for about 1 hour until firm.
Step 4 – Cut the Bars
Lift the set slab using parchment edges. Place it on a cutting board. With a slightly warm, sharp knife, cut into desired bar sizes.
Step 5 – Melt and Temper the Chocolate
Melt chocolate in a double boiler or microwave at 50 % power in 20-second bursts. Stir until smooth.
(Tempering ensures a glossy finish and crisp snap.)
Step 6 – Coat the Bars
Using forks or dipping tools, submerge each bar in melted chocolate, ensuring full coverage. Lay coated bars on parchment paper to set.
Refrigerate 20–30 minutes until hardened.
Serving and Presentation Ideas
- Classic Candy-Bar Look: Trim edges neatly; wrap each in wax paper or gold foil.
- Mini Bites: Cut into small squares and serve in candy cups.
- Dessert Garnish: Slice thin bars to top ice-cream sundaes or cupcakes.
- Gift Boxes: Pair with homemade truffles or fudge for festive gifting.
Recipe Variations
- Dark Chocolate Milky Ways – Replace milk chocolate with 60–70 % dark chocolate for a bittersweet edge.
- Peanut Butter Milky Ways – Spread a thin peanut-butter layer over the nougat before adding caramel.
- Nutty Milky Ways – Sprinkle chopped roasted almonds, hazelnuts, or pecans over caramel.
- Salted Caramel Milky Ways – Finish each bar with flaky sea salt before the chocolate sets.
- Vegan Version – Substitute plant-based butter, coconut cream, and aquafaba for dairy and eggs.
- Espresso Twist – Add ½ teaspoon espresso powder to the nougat for mocha flavor.
- Holiday Edition – Drizzle white chocolate and top with crushed peppermint candy.
Expert Candy-Making Tips
- Temperature Accuracy = Success. Always use a candy thermometer; a few degrees off can ruin texture.
- Avoid Humid Days. Excess moisture can make nougat sticky.
- Never Stir Crystallizing Sugar. Once syrup boils, swirl gently—don’t stir—to prevent grainy caramel.
- Keep Tools Dry. Even a drop of water can seize melted chocolate.
- Patience Pays Off. Allow layers to cool fully before combining; rushing causes them to merge unevenly.
Storage and Shelf Life
- Refrigerator: Store bars in an airtight container for up to 2 weeks.
- Freezer: Freeze up to 3 months; separate layers with parchment. Thaw at room temperature.
- Room Temperature: Safe for 2–3 days in a cool, dry environment.
- Avoid Heat: Warm kitchens can cause chocolate to bloom (white streaks) but still taste fine.
Troubleshooting Guide
| Problem | Cause | Fix |
|---|---|---|
| Nougat too sticky | Undercooked syrup or high humidity | Reheat syrup to correct temp next time; dust bars lightly with cocoa before coating |
| Caramel too hard | Overcooked or too little cream | Add a tablespoon of warm cream and stir to soften |
| Chocolate dull or streaky | Improper tempering | Melt chocolate gently to 88–90 °F (31 °C) and cool correctly |
| Layers separating | Combined while warm | Let each layer cool completely before stacking |
| Bars melt in hand | Thin coating or high heat | Use slightly thicker chocolate shell or store chilled |
Health and Nutrition Snapshot
(Approximate per 1 bar)
- Calories: 280–300
- Fat: 16 g
- Carbohydrates: 34 g
- Protein: 3 g
- Fiber: 1 g
These are indulgent treats meant for occasional enjoyment—perfect for sharing rather than counting!
Creative Ways to Enjoy Your Homemade Milky Ways
- Chop and Mix: Stir chunks into cookie dough or brownie batter.
- Candy Milkshake: Blend one bar with vanilla ice cream and milk.
- S’mores Upgrade: Swap the chocolate square for a Milky Way slice.
- Cupcake Filling: Insert a mini bar into cupcake centers before baking.
- Frozen Bars: Enjoy them chilled for a firm, snappy texture on hot days.
Common Questions (FAQs)
1. Can I make these without corn syrup?
Yes. Substitute honey or golden syrup. The texture may be slightly softer but still delicious.
2. What if I don’t have a candy thermometer?
Drop a bit of syrup into cold water; if it forms a firm ball, it’s ready. However, for consistent results, a thermometer is recommended.
3. How do I prevent chocolate from seizing?
Melt slowly over gentle heat; ensure all utensils are completely dry.
4. Are Homemade Milky Ways gluten-free?
Yes—none of the ingredients naturally contain gluten. Always check your chocolate brand to confirm.
5. Can I add flavorings to the nougat?
Absolutely! Almond, coffee, or maple extracts can personalize flavor.
6. Do I need to refrigerate the bars?
Refrigeration helps chocolate set firmly and extends freshness. Keep sealed to prevent moisture.
7. How long do they keep?
Up to 2 weeks refrigerated, or 3 months frozen.
8. Why did my caramel turn grainy?
Sugar crystals formed on the pan sides—brush with wet pastry brush while cooking to prevent recrystallization.
9. Can kids help make this recipe?
Yes—with supervision. Let them dip cooled bars or decorate with drizzled chocolate.
10. Can I use dark or white chocolate instead of milk?
Yes. Both work beautifully; adjust sweetness accordingly.
The Science Behind Homemade Candy
Creating candy combines chemistry and craftsmanship. Sugar syrup transforms through stages—thread, soft-ball, firm-ball, hard-ball, soft-crack, and hard-crack—each producing different textures. The nougat’s airy structure forms when hot syrup partially cooks egg proteins, trapping tiny air bubbles that later firm into chewiness. Meanwhile, caramelization happens when sugar molecules break down, generating hundreds of flavor compounds responsible for that irresistible toffee aroma. Understanding these reactions makes you a confident confectioner rather than a guess-and-check cook.
Safety Tips for Candy Making
- Always use heat-resistant tools—hot syrup can cause serious burns.
- Keep a bowl of cold water nearby for emergencies.
- Never add large amounts of liquid to boiling caramel; pour slowly.
- Work on a stable, uncluttered counter.
- Allow pans to cool before washing—rapid temperature changes may crack glass or warp metal.
Packaging and Gifting Ideas
Homemade Milky Ways make elegant edible gifts. Here’s how to elevate presentation:
- Individually Wrap: Use wax or parchment squares, then tie with twine.
- Decorate Boxes: Arrange bars in paper-lined tins or kraft boxes with festive ribbons.
- Add a Personal Tag: Include ingredients and storage notes.
- Theme Colors: Gold for holidays, pastels for birthdays, or silver for weddings.
Handmade candy shows care—each bar is a small act of sweetness and craftsmanship.
Pairing Suggestions
- Drinks: Coffee, hot cocoa, or black tea complement chocolate richness.
- Desserts: Serve alongside fruit salad or plain cheesecake for contrast.
- Wine or Spirits (for adults): Pair with tawny port or bourbon for an indulgent dessert tasting.
Sustainability and Ingredient Ethics
Whenever possible, choose fair-trade chocolate, organic sugar, and local butter or cream. Supporting ethical sourcing enhances flavor and aligns your delicious creation with environmental responsibility.
Use reusable parchment sheets and store bars in glass containers instead of disposable plastic. Even small sustainable choices make homemade candy more rewarding.
Quick Summary for Busy Cooks
- Prep Time: 30 minutes
- Cook Time: 40 minutes
- Chill Time: 2 hours
- Total: ≈ 3 hours 10 minutes
- Yield: 12–15 bars
- Skill Level: Intermediate
If you love baking, you’ll find this recipe straightforward once you gather the ingredients and read through each step.
Printable Recipe Card
Homemade Milky Ways
Easy Copycat Candy Bar Recipe
Ingredients:
- Nougat: sugar, corn syrup, water, egg whites, vanilla, salt
- Caramel: sugar, butter, cream, vanilla, salt
- Coating: milk chocolate
Instructions:
- Cook syrup to 245 °F; whip into egg whites. Spread in pan.
- Cook caramel to 245 °F; pour over nougat. Chill 1 hour.
- Cut bars; dip in melted chocolate.
- Chill until set. Store airtight.
Notes: Use thermometer for precision; vary chocolate type to taste.
Conclusion: A Sweet Reward Worth Every Step
Making Homemade Milky Ways transforms an everyday candy into a masterpiece of flavor and texture. You’re not only recreating a childhood favorite—you’re elevating it. Each layer tells a story: airy nougat symbolizing patience, caramel embodying warmth, and chocolate sealing everything with comfort.
Whether you prepare these bars for family, friends, or yourself, the satisfaction goes beyond taste. It’s the pride of knowing you created something from simple ingredients that rivals any store-bought treat. Keep experimenting, stay curious, and enjoy the sweet science of candy making—one silky, caramel-filled bite at a time.