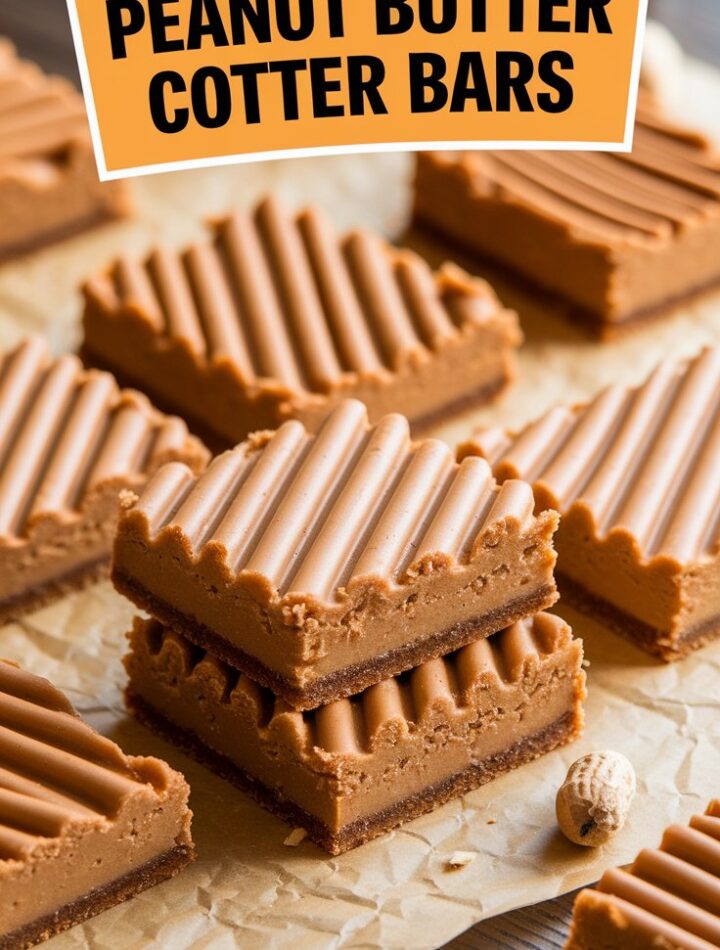
Few desserts bring the same level of comfort and nostalgia as peanut butter cookies. But when you transform those classic cookies into thick, chewy bars topped with a glossy glaze, you elevate them into something truly unforgettable. Chewy Glazed Peanut Butter Cookie Bars combine the rich, nutty flavor of peanut butter with a soft, moist texture and just the right touch of sweetness on top.
This recipe isn’t just another dessert—it’s a treat that checks every box:
- Easy to prepare.
- Made with simple, pantry-friendly ingredients.
- Perfect for sharing at gatherings, potlucks, or school events.
- Highly versatile, with endless variations to suit your taste.
In this guide, we’ll walk through everything you need to know: ingredients, step-by-step directions, baking tips, variations, storage hacks, and even troubleshooting advice. Whether you’re a seasoned baker or just starting your baking journey, you’ll find this recipe approachable, fun, and guaranteed to impress.
Why You’ll Love These Peanut Butter Cookie Bars
Let’s start with what makes these cookie bars stand out:
- Soft and Chewy Texture – Unlike dry cookies, these bars bake up moist and chewy thanks to the perfect ratio of butter, sugar, and peanut butter.
- Balanced Sweetness – The glaze adds sweetness but doesn’t overpower the peanut butter flavor.
- Easy to Slice and Share – Forget scooping individual cookies; just bake, glaze, slice, and serve.
- Quick Prep – From start to finish, you can have a batch ready in under an hour.
- Customizable – Mix in chocolate chips, swirl with jam, or drizzle with melted chocolate to make them your own.
- Crowd-Friendly – Perfect for parties, bake sales, school lunches, or casual snacking.
If you’ve ever wished peanut butter cookies were easier to bake in large quantities while still keeping their chewy goodness, these bars are the answer.
Ingredients Breakdown
Understanding the role of each ingredient helps ensure perfect results. Here’s what you’ll need and why:
For the Bars:
- Creamy Peanut Butter (1 cup) – The star of the recipe. It provides nutty richness and chewy texture. Avoid natural peanut butter with oil separation, as it can alter the texture.
- Unsalted Butter, Softened (½ cup) – Adds richness, moisture, and helps create a tender crumb. Using unsalted butter lets you control the salt level.
- Brown Sugar, Packed (1 cup) – Gives a deeper caramel-like flavor and keeps the bars moist.
- Granulated Sugar (½ cup) – Balances sweetness and helps with structure.
- Eggs (2 large) – Bind ingredients and add richness. They also help with chewiness.
- Vanilla Extract (1 teaspoon) – Enhances flavor and adds warmth.
- All-Purpose Flour (1½ cups) – The structure of the bars. Too much flour will make them dry; proper measurement is key.
- Baking Soda (1 teaspoon) – Provides lift and prevents the bars from becoming dense.
- Salt (¼ teaspoon) – Balances sweetness and enhances peanut butter flavor.
For the Glaze:
- Powdered Sugar (1 cup) – Creates a smooth, glossy glaze.
- Milk (2–3 tablespoons) – Adjusts the glaze consistency. You can use whole milk, cream, or even non-dairy alternatives.
- Vanilla Extract (½ teaspoon) – Adds depth of flavor to the glaze.
Step-by-Step Directions
1. Preheat the Oven
Set your oven to 350°F (175°C). Grease or line a 9×13-inch baking pan with parchment paper. This ensures easy removal and neat slicing later.
2. Cream the Wet Ingredients
In a large bowl, beat together the softened butter, peanut butter, brown sugar, and granulated sugar until smooth and fluffy. This step incorporates air, giving your bars a lighter texture.
3. Add the Eggs and Vanilla
Beat in the eggs one at a time, followed by the vanilla extract. Make sure each egg is fully incorporated before adding the next.
4. Combine the Dry Ingredients
In a separate bowl, whisk together flour, baking soda, and salt. Slowly add this dry mixture to the wet ingredients, mixing just until combined. Overmixing can make the bars tough.
5. Spread and Bake
Spread the dough evenly into the prepared pan. Bake for 20–25 minutes, or until the edges are golden brown and the center is set but still soft. A toothpick should come out with a few moist crumbs.
6. Make the Glaze
While the bars bake, whisk together powdered sugar, milk, and vanilla extract until smooth. Adjust the milk for your desired consistency—thicker for spreading, thinner for drizzling.
7. Glaze the Bars
As soon as the bars come out of the oven, pour the glaze over the warm surface. Spread evenly with an offset spatula or back of a spoon. The warmth helps the glaze set beautifully with a shiny finish.
8. Cool and Slice
Let the bars cool completely before slicing into squares or rectangles. This ensures clean cuts and allows the glaze to firm up.
Pro Baking Tips
- Measure Flour Correctly – Always spoon flour into your measuring cup and level it off. Too much flour makes bars dry.
- Don’t Overbake – Pull the bars out when the center still looks slightly soft. They’ll continue to set as they cool.
- Use Room-Temperature Ingredients – Butter and eggs at room temp incorporate better, giving you a smoother batter.
- Customize the Glaze – Swap vanilla with almond extract for a subtle twist, or add a spoonful of peanut butter for extra richness.
- Line with Parchment – This makes it easy to lift out the entire slab and slice neatly.
Variations
The beauty of this recipe is how adaptable it is. Try these fun spins:
- Chocolate Chip Peanut Butter Bars – Stir 1 cup of chocolate chips into the batter before baking.
- Peanut Butter & Jelly Bars – Swirl ½ cup of your favorite jam (strawberry or raspberry) into the batter.
- Nutty Crunch – Add ½ cup of chopped peanuts for a crunchy texture.
- Salted Caramel Glaze – Replace the glaze with a drizzle of salted caramel for a decadent twist.
- Frosted Bars – Spread a thick layer of peanut butter frosting instead of glaze for a bakery-style treat.
- Holiday Version – Sprinkle red and green M&Ms into the batter for festive flair.
Storage and Make-Ahead Tips
- Room Temperature – Store bars in an airtight container for up to 3 days.
- Refrigeration – Keeps them fresh for up to 1 week, but the glaze may firm up slightly. Let them come to room temp before serving.
- Freezing – Wrap individual bars in plastic wrap, then store in a freezer-safe bag for up to 2 months. Thaw at room temp.
- Make-Ahead – Bake the bars a day before serving. They actually taste even better once the flavors settle overnight.
FAQs
Q: Can I use natural peanut butter?
Yes, but it may make the batter oilier. For best results, use creamy processed peanut butter like Jif or Skippy.
Q: Can I double the recipe?
Absolutely! Use a larger pan (like 11×15) or bake in two pans.
Q: Can I make these gluten-free?
Yes, substitute a cup-for-cup gluten-free flour blend.
Q: Can I use crunchy peanut butter?
Yes, it adds great texture! Just be aware the bars will have a slightly different bite.
Q: Do I have to glaze them?
No. The bars are delicious on their own, but the glaze adds extra sweetness and visual appeal.
Q: Can I make them dairy-free?
Use vegan butter and plant-based milk in the glaze.
Q: How do I keep them chewy?
Don’t overbake and store them in an airtight container.
Serving Ideas
- Serve warm with a scoop of vanilla ice cream for a peanut butter sundae experience.
- Pair with coffee or hot cocoa for a cozy snack.
- Cut into mini squares and add to dessert platters for parties.
- Wrap in parchment and tie with ribbon for a homemade gift.
Troubleshooting
- Bars too dry? You likely added too much flour or overbaked.
- Bars sinking in the middle? This can happen if underbaked—make sure edges are golden before removing.
- Glaze too runny? Add more powdered sugar.
- Glaze too thick? Add a teaspoon of milk until pourable.
Conclusion
Chewy Glazed Peanut Butter Cookie Bars are the ultimate comfort dessert: chewy, rich, and sweet, yet incredibly easy to make. With just a handful of ingredients and less than an hour of time, you can whip up a dessert that delights kids and adults alike.
Whether you keep them classic with a vanilla glaze or customize them with chocolate chips, swirls of jam, or crunchy nuts, these bars are a guaranteed crowd-pleaser. Bake a batch today and see why peanut butter lovers can’t resist this chewy, glazed perfection.
Printable Recipe Card
Chewy Glazed Peanut Butter Cookie Bars
Yield: 24 bars | Prep: 15 minutes | Bake: 25 minutes | Total: 40 minutes
Ingredients
- 1 cup creamy peanut butter
- ½ cup unsalted butter, softened
- 1 cup brown sugar, packed
- ½ cup granulated sugar
- 2 large eggs
- 1 teaspoon vanilla extract
- 1½ cups all-purpose flour
- 1 teaspoon baking soda
- ¼ teaspoon salt
Glaze
- 1 cup powdered sugar
- 2–3 tablespoons milk
- ½ teaspoon vanilla extract
Instructions
- Preheat oven to 350°F (175°C). Grease or line a 9×13-inch pan.
- Beat peanut butter, butter, brown sugar, and granulated sugar until fluffy.
- Add eggs and vanilla; beat until combined.
- Mix flour, baking soda, and salt in a bowl. Add gradually to wet mixture.
- Spread batter in pan and bake 20–25 minutes, until edges are golden.
- Whisk glaze ingredients until smooth. Spread over warm bars.
- Cool completely before slicing.
Notes:
- Avoid overbaking for maximum chewiness.
- Adjust glaze thickness with more milk or sugar.
- Store in an airtight container to maintain softness.


