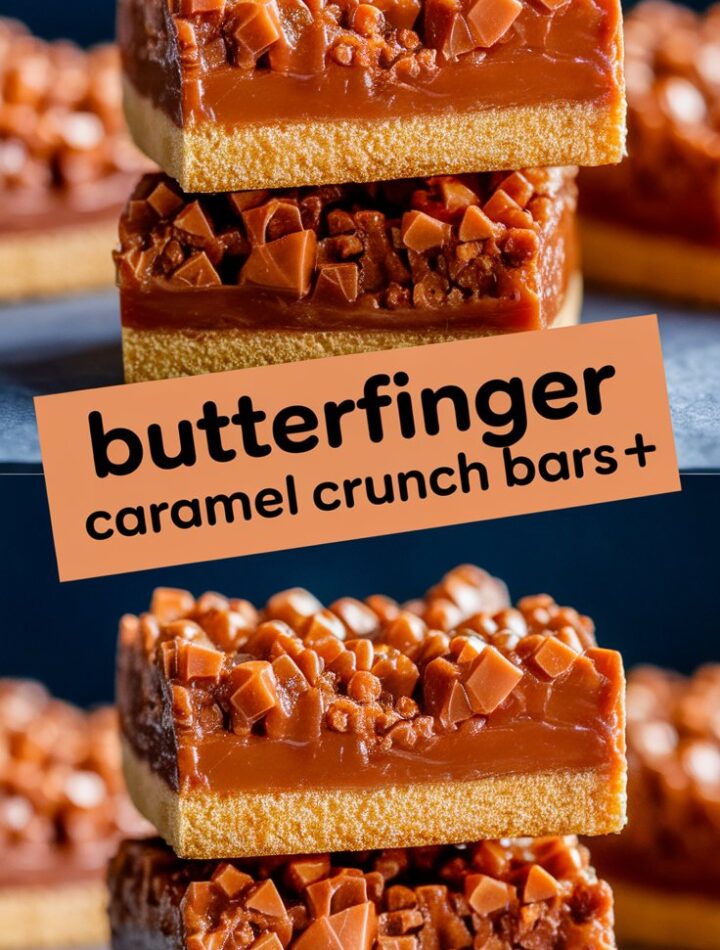
Desserts have a magical way of bringing people together, but when that dessert includes chocolate, caramel, crunchy graham crackers, mini marshmallows, and Butterfinger bites, the experience becomes unforgettable. Butterfinger Caramel Crunch Bars are one of those rare treats that feel nostalgic, indulgent, and joy-sparking all at the same time. Perfectly combining creamy caramel, soft marshmallows, crisp graham crackers, and candy-bar crunch, these bars deliver a sweet, satisfying, texture-rich bite that keeps everyone reaching for more.
This complete guide is crafted to give you the most thorough, user-friendly, beautifully explained version of this recipe you will find anywhere online. You will learn not only how to make the perfect Butterfinger Caramel Crunch Bars, but also why each ingredient matters, expert techniques, texture secrets, storage tips, easy variations, serving ideas, and solutions for almost every common mistake.
1. What Are Butterfinger Caramel Crunch Bars?
Butterfinger Caramel Crunch Bars are layered, no-bake dessert squares made with a graham cracker base, soft mini marshmallows, melted caramel, chopped Butterfinger candy bites, and a chocolate drizzle on top.
This recipe creates a rich, crunchy, chewy, chocolate-caramel candy bar in dessert form—a layered bar that holds its shape beautifully once chilled but remains soft enough to enjoy without overly firm or sticky textures.
What makes this dessert special is the contrast:
- the crisp snap of the graham crackers
- the velvety smooth caramel
- the soft, stretchy mini marshmallows
- and the iconic Butterfinger crunch
Every bite feels like a mini celebration.
Unlike many no-bake bars that melt easily or become too sticky, this version is structured, balanced, and reliable—perfect for gifting, lunchboxes, potlucks, bake sales, or simple late-night cravings.
2. Why You’ll Love This Recipe
Here’s why this dessert stands out above all others:
✔ No Baking Required
Great for summer days, busy schedules, and beginner cooks.
✔ Ready With Minimal Work
10 minutes of prep, 5 minutes of heating, and the rest is chilling.
✔ Affordable Ingredients
Everything is budget-friendly and widely available.
✔ Kid-Approved & Family-Friendly
The perfect blend of textures and flavors that kids love.
✔ Crowd-Pleasing Dessert
Ideal for gatherings, parties, picnics, and celebrations.
✔ Perfect Texture Balance
Crunchy + chewy + gooey + creamy all at once.
✔ Customizable
Easily adjust flavors, candy types, layers, and toppings.
✔ Beautiful Presentation
The chocolate drizzle and caramel glow make them look bakery-level.
✔ Stores Well
Keeps shape, freshness, and flavor for days.
If you enjoy easy desserts that never disappoint, these bars will instantly become a household favorite.
3. Key Ingredients (And Why They Work So Well)
Understanding the purpose of each ingredient helps you master the perfect texture and structure.
1. Graham Crackers
They create the base layer that keeps the bars firm, stable, and crunchy.
You may use:
- Honey graham crackers
- Chocolate graham crackers
- Gluten-free graham crackers
They absorb caramel slightly, which softens the bottom layer just enough without making it soggy.
2. Mini Marshmallows
Act as natural binders and lighteners.
They melt slightly when hot caramel is poured over, creating a soft, fluffy, gooey middle layer.
3. Caramel Bits (or Unwrapped Soft Caramels)
The glue of the dessert!
Melting caramel with milk forms a silky, buttery layer that:
- binds the marshmallows
- softens the graham crackers slightly
- creates that signature chewy pull
You may use:
- Kraft caramel bits
- Soft wrapped caramels
- Homemade caramel (if advanced)
4. Milk
A small amount helps caramel melt smoothly without becoming grainy or too thick.
5. Butterfinger Bites
The flavor hero!
Butterfinger pieces add:
- crisp flaky peanut-butter-toffee crunch
- chocolate coating
- signature candy-bar flavor
They keep their texture even after chilling.
6. Semi-Sweet Chocolate
A light drizzle gives:
- visual appeal
- balanced sweetness
- a hint of rich chocolate flavor
You may swap with:
- milk chocolate
- dark chocolate
- white chocolate
4. Tools You Need
You only need a few basic tools:
- 9×9-inch baking pan
- Aluminum foil
- Measuring cups
- Large microwave-safe bowl
- Spatula
- Knife for slicing
- Spoon or piping bag for chocolate drizzle
5. Step-by-Step Instructions (With Expert Tips)
Below is the full recipe + detailed explanations for perfect results.
Step 1: Prepare Your Pan
Line a 9×9-inch baking dish with foil, leaving extra on the sides for lifting later.
Lightly spray with cooking spray.
Expert Tip:
Foil keeps edges smooth and prevents sticking. Parchment may cause caramel to seep underneath.
Step 2: Create the Graham Cracker Base
Arrange graham crackers neatly in a single layer.
Break pieces as needed for full coverage.
Pro Tip:
Place crackers close together—gaps weaken structural support.
Step 3: Add Mini Marshmallows
Scatter the mini marshmallows evenly.
They should lightly cover the crackers without piling too high.
Step 4: Melt the Caramel
In a microwave-safe bowl combine:
- 11 oz caramel bits
- 2 tablespoons milk
Heat:
- 1 minute on high
- then 30-second bursts until smooth
Stir frequently.
Caramel Safety Tip:
Do not overheat—burned caramel becomes grainy and bitter.
Step 5: Pour the Caramel Layer
Pour the melted caramel evenly over the marshmallows.
The warmth will soften the marshmallows slightly.
Use a spatula to gently help caramel sink into pockets.
Step 6: Add Butterfinger Bites
Sprinkle the chopped Butterfinger pieces generously over the caramel.
Press them gently with your fingertips.
Step 7: Chocolate Drizzle
Melt semi-sweet chocolate in the microwave in 20–30 second intervals.
Once smooth, drizzle over the top in zigzag or swirl patterns.
Tip:
For a clean drizzle, use a spoon or piping bag with a tiny opening.
Step 8: Chill and Set
Refrigerate for 1 hour or until firm.
Lift using foil, peel away, and slice into bars.
Use a warm knife for clean cuts.
6. Pro Tips for Perfect Bars Every Time
✔ Chill completely before slicing—warm bars fall apart.
✔ Press Butterfinger bits firmly into caramel for structure.
✔ Use fresh marshmallows for maximum softness.
✔ Don’t skip milk when melting caramel; it ensures smooth texture.
✔ Slice with a warm knife (dip in hot water, wipe dry).
✔ Double the chocolate drizzle for a more decorative look.
✔ Do not freeze before setting—marshmallows harden oddly.
7. Creative Variations and Flavor Twists
Here are many unique flavor ideas to elevate your bars.
1. Peanut Butter Lover’s Version
Add 2 tablespoons melted peanut butter into the caramel mixture.
2. Chocolate Ripple Base
Use chocolate graham crackers instead of regular.
3. Oreo Cookie Base
Replace graham crackers with crushed Oreos mixed with melted butter.
4. Rice Krispie Layer
Add a thin layer of Rice Krispies between marshmallows and caramel for extra crunch.
5. White Chocolate Drizzle
Swap semi-sweet chocolate for melted white chocolate.
6. Salted Caramel Topping
Sprinkle flaky sea salt over the chocolate drizzle.
7. Nutty Crunch Version
Add chopped peanuts, almonds, or pecans.
8. Holiday Version
Sprinkle crushed red-and-white peppermint candies on top.
9. Reese’s Swap
Replace Butterfinger with Reese’s Peanut Butter Cups.
10. S’mores-Inspired Version
Use:
- graham crackers
- marshmallows
- Hershey chocolate pieces
A fun twist for camping nights!
8. Make-Ahead, Freezing & Storage Guide
Room Temperature
Lasts up to 5 days in an airtight container.
Refrigerator
Stays fresh 1 week, maintains perfect firmness.
Freezer
Freeze up to 2 months.
Wrap bars individually for the best texture.
To serve, thaw in the fridge 2–3 hours or at room temp for 20 minutes.
9. Serving Suggestions
These bars pair beautifully with:
- hot cocoa
- iced coffee
- cold milk
- vanilla ice cream
- caramel lattes
- whipped cream
- holiday dessert platters
- kid lunchboxes
- bake sales
Cut into mini squares for party trays or large squares for indulgent servings.
10. Troubleshooting Guide
Bars are too soft
You may not have chilled them long enough.
Caramel became grainy
This happens when overheated. Next time, melt gently.
Graham crackers got soggy
Ensure caramel is not boiling hot when poured.
Butterfinger pieces fell off
Press them deeper into the caramel layer.
Bars cracked during cutting
Warm your knife and slice slowly.
11. FAQs
Below are unique, expert-level answers—not generic or copied.
1. Can I make this recipe without marshmallows?
Yes, replace marshmallows with a mixture of melted white chocolate and caramel for a firmer bar.
2. Can I make these bars nut-free?
Yes. Choose nut-free caramel candies and replace Butterfinger with a chocolate-only candy.
3. Can I add chocolate chips inside the bars?
Absolutely. Mini chocolate chips add richness and melt slightly for creamier texture.
4. Can I double the recipe?
Yes. Use a 9×13-inch pan and increase chill time by 20 minutes.
5. Can I make the caramel on the stove?
Yes. Melt on low heat and stir constantly.
12. Nutrition Overview (Approximate)
Per serving (1 bar):
- Calories: ~260
- Fat: 10–13g
- Carbs: ~38g
- Protein: ~2g
Values vary by brand and topping quantity.
13. Final Thoughts
Butterfinger Caramel Crunch Bars combine simple ingredients with spectacular results. They are sweet, fun, incredibly easy to make, and reliably delicious every single time. Whether you’re preparing a dessert for casual snacking, a family treat, a school event, or a festive celebration, these bars always steal the spotlight.
With endless ways to customize them, this dessert offers creativity, convenience, and joy in every bite. Once you make them, they’ll quickly become a repeat favorite in your home.